This is part of a series on fixing audio problems in Windows. You may wish to start with the main article.
This information is provided as a quick reference. Please don't contact me for tech support, but instead use web searches to find further information. The included screenshots are from Windows 10 Professional but other recent Windows versions will have similar procedures.
Some sites recommend being very aggressive with these optimisations. My advice is the opposite: remove only what you know you don't need. If you later discover that a particular component is indeed causing you problems, that can then be surgically removed.
This article covers four topics:
1. Removing applications
2. Removing anti-virus software
3. Removing startup apps
4. Removing background services
1. Removing applications
Over the course of months and years, you will install a fair number of programs. But likely you never return to clean up what is no longer needed. Though this is unlikely to improve any audio glitches, it's included here as an essential step in maintaining your computer environment, as it recovers disk space.
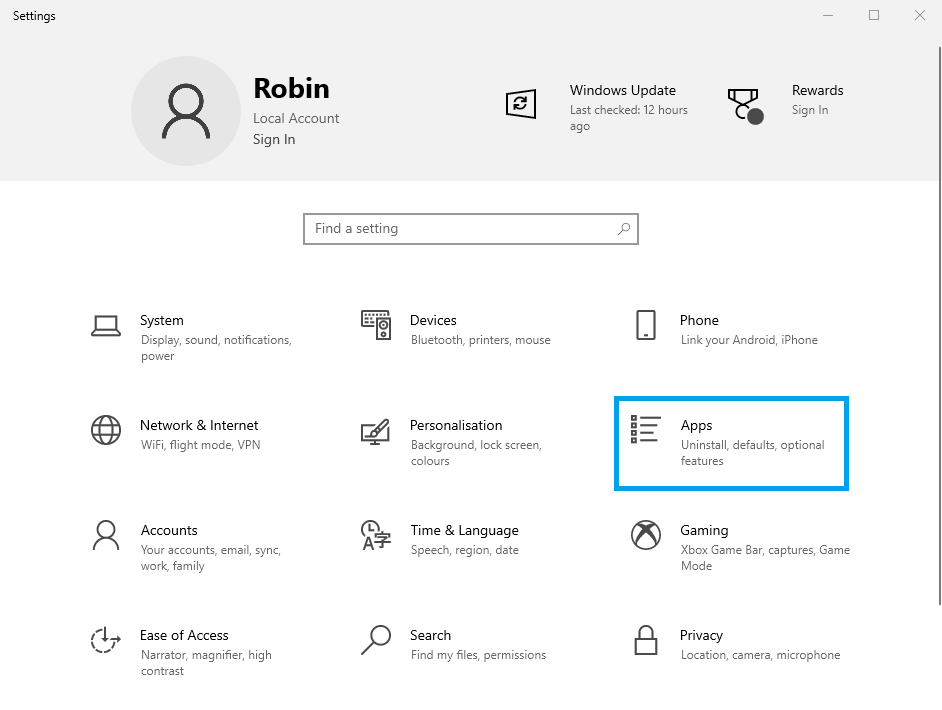
Begin by using the key combination Win+i to launch "Settings". Then choose "Apps".

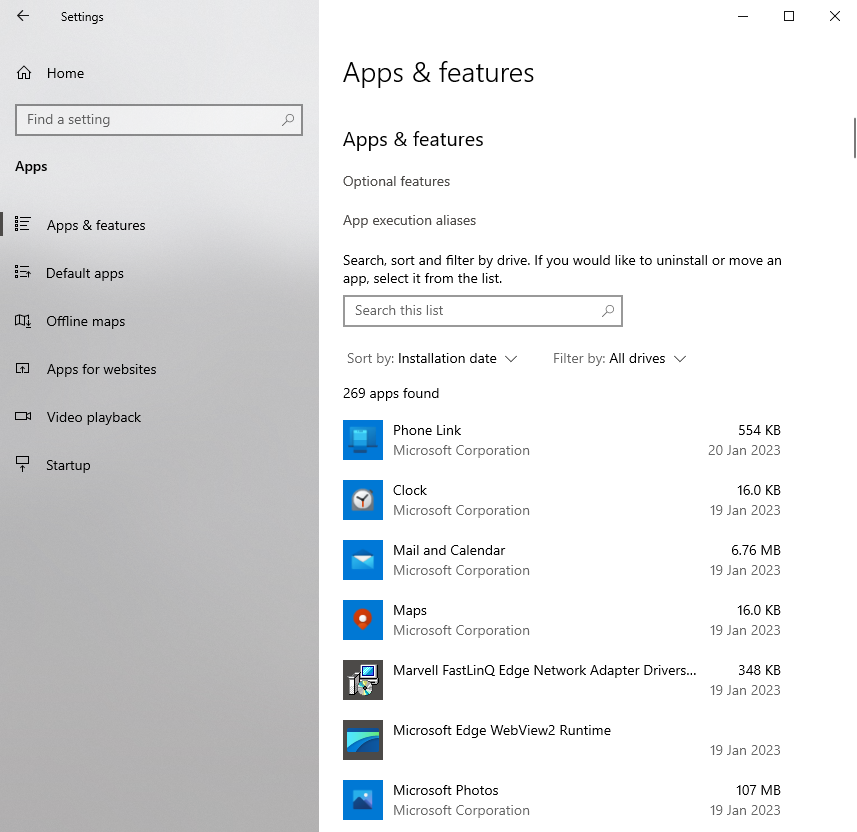
The "Apps & features" panel lists every program on your computer, both automatic installations and those you've made manually. It's often convenient to sort by date.

Not that some Windows apps tend to be re-installed with every Windows update. This is an annoying tendency.
2. Removing anti-virus software
It's not 1995 any longer. Windows Defender does a fine job of protecting your system. In my experience third-party anti-virus applications do more harm than good. I've seen them entirely trash systems. At the very least they are invasive and eat CPU cycles.
Remove all such software using the step above.
3. Removing startup apps
When Windows starts, it launches a number of applications that appear on your task bar. These occupy memory and can use CPU cycles for maintenance tasks, even when not running in the foreground. It makes sense to trim the fat.
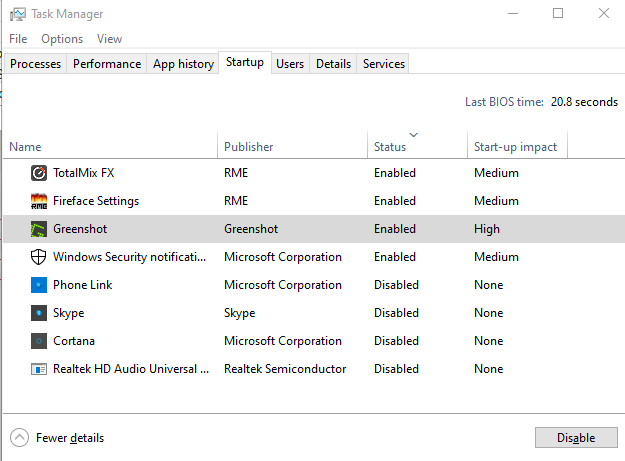
Open Task Manager from the Start menu or with the key combination Ctrl+Shift+Esc. Select the Startup tab. Applications that you don't want loaded can be disabled with the button.

I strongly recommend disabling Cortana and any media applications. As you can see, I have also removed an app that uses the built-in Realtek motherboard sound chip. But I've retained Windows Security and the two RME apps. (BTW, Greenshot is the application I use to make the screenshots you see in these articles.)
4. Removing background services
Open "System Configuration" from the start menu in the usual way: tap the Win key and then type in the name. This utility is useful for performing a "safe" boot, one with minimal features loaded.
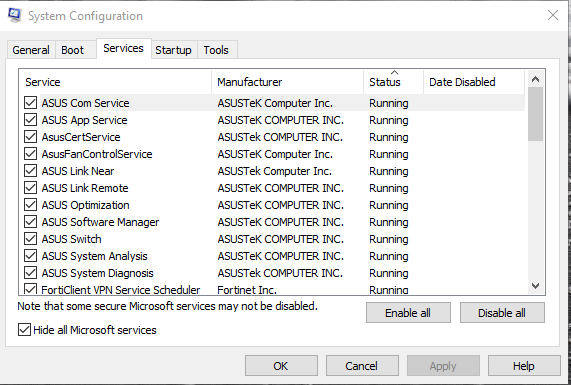
But today we will use this application to examine background services. Change to the "Services" tab. Click the "Status" column to sort by running components.
Be sure to check "Hide all Microsoft services" so that you don't accidentally disable a component essential to the running of your computer.

Now you can uncheck running applications that you wish to terminate. When you are done, click "Apply". When you exit the program, you will be prompted to reboot.
Note that in my case I have a large number of services for my ASUS motherboard. Chances are, these are not essential. But as I have no immediate reason to delete them, I keep them around. Your approach may be different. Again, some sources recommend disabling all of these services, and then adding back what is essential.
No comments:
Post a Comment