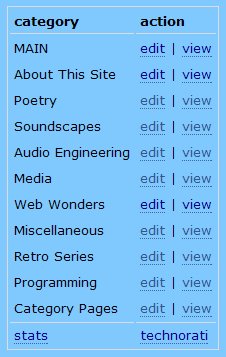
I am sure that any time you've needed to go back and edit an existing article it's been a bit of a pain. You must go to the Posting tab of Blogger, choose the link "Edit posts", wait for a list of all your articles to render, and then scroll down to find the right one. For a large site this is tedious, especially if you need to edit a given page often. And if you're going to follow my method for article categories you do in fact have this need.
The trick is to notice that when you edit an article, there is a specific URL that corresponds to that edit page. It will look something like this: www.blogger.com/post-edit.g?blogID=12&postID=34 where "12" is a unique number corresponding to your blog and "34" is the unique ID of the article itself.
All you need to do is make a list of all of these URLs, together with a description of the article. And what's the best way to do that? Why, create your own little HTML page. That way you can launch an edit window with a single click.

While you are at it, you can put in links to the finished pages, to make it easy to check your work. Put in links to your home page, and your main Blogger login too. The screen shot shows what this looks like for me... couldn't be easier.
Creating local HTML files can be an amazing time-saving device. I have a default web page that loads in my browser which contains dozens of links to all the places I'm likely to need to go. It's more organised than any bookmark system.
I hope you enjoy this tip, obvious though it may be. If you do, leave a friendly comment!

